

Navigate: Setting Up Faculty or Staff Office Hours
Benefits of Using Navigate for Appointments
Other institutions that have utilized Navigate for all student appointments identified the following benefits:
- a decrease in no-show appointments,
- an increase in student utilization of office hours
Navigate has a Personal Availability Link (PAL) that faculty and staff can add to their signature in their email for students to click on and go directly to the staff calendar to schedule an appointment.
There are several service categories and service types that faculty can indicate they are available to assist with. Students can then select these services when scheduling an appointment with faculty.
| Service Category | Service | Default Appointment Length |
|---|---|---|
| Transfer Student Support | New Transfer Student introduction | 45 minutes |
| Transfer Student Support | Review my transfer credits | 30 minutes |
| Advisee Meeting | Planning my classes | 30 minutes |
| Advisee Meeting | Change majors | 30 minutes |
| Advisee Meeting | Accelerated major information | 30 minutes |
| Career Support | Internship Opportunities | 30 minutes |
| Career Support | Next Steps after graduation | 30 minutes |
| Meet with my course professor | Help with assignments | 30 minutes |
| Meet with my course professor | Discuss course/test grade | 30 minutes |
| Meet with my course professor | Help with an assignment | 30 minutes |
| Other | Study Abroad Opportunities | 30 minutes |
| Other | 30 minutes |
Benefits to Students
Student Self-service appointment scheduling via the mobile* or desktop application
Navigate provides an excellent way for students to communicate with their instructors and other staff members at WCU.
- By clicking on the Get Assistance button, students can make appointments with their
advisors or with staff in various student support offices that utilize Navigate for
appointments. Students indicate what type of appointment they are looking to schedule,
then select the services they want.

- View their class schedule (shows class, time, place, & instructor)
- Check their to-dos.
- View their Success Team members (current semester instructors, advisors, success coaches)
- Review all the WCU resource offices available on campus (provides description and contact information)
- Sign up for study buddies - Study Buddies lets students connect with other students in their class sections who are interested in studying together outside of class.
*Only students have the mobile app. Staff and Faculty have access to Navigate through the desktop
Getting Started
Accessing Navigate
- Login to Navigate.
- Use your WCU credentials.
Navigate Login Screen
Other Option
Open your browser (Chrome) and type in wcupa.campus.eab.com to go to the Navigate login screen. Use your WCU username and password to sign in. Bookmark this page for easy access.
When you log in to Navigate, it will open your home page.
- You may land on a Staff or Professor homepage.
- Each role will show different information.
- There will be an arrow next to the name to allow you to toggle between the roles.
To set up your appointment availability, you need to be on the Staff homepage.
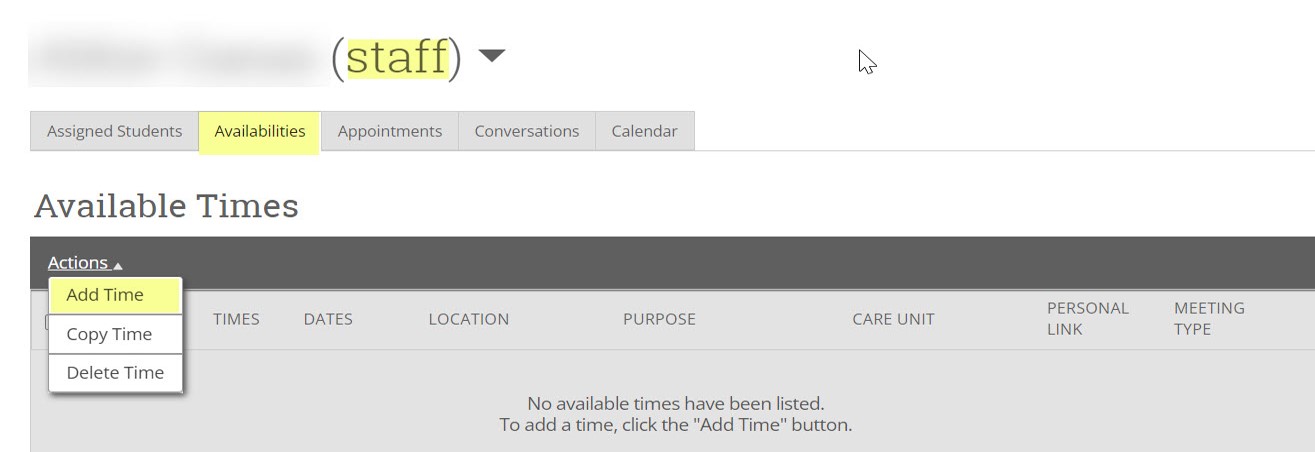
Setting Up Available Times
- Click on the Availabilities Tab.
- Click on the Actions heading.
- Scroll down and click on Add Time.
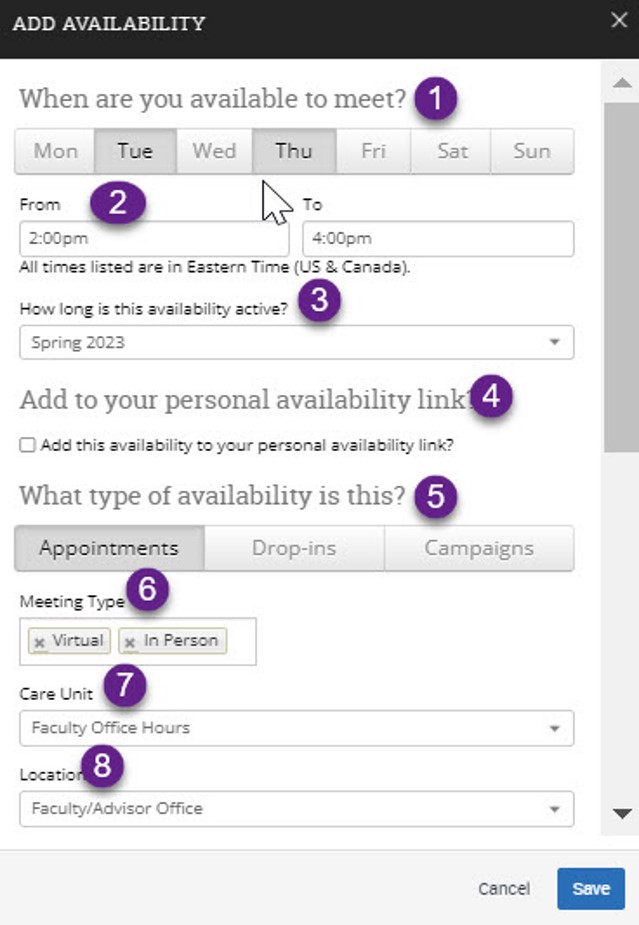
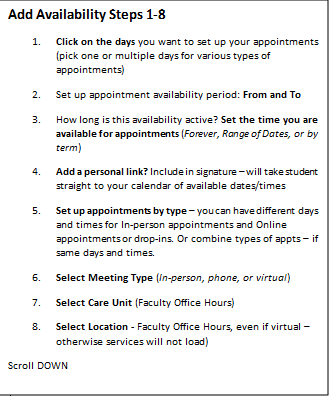
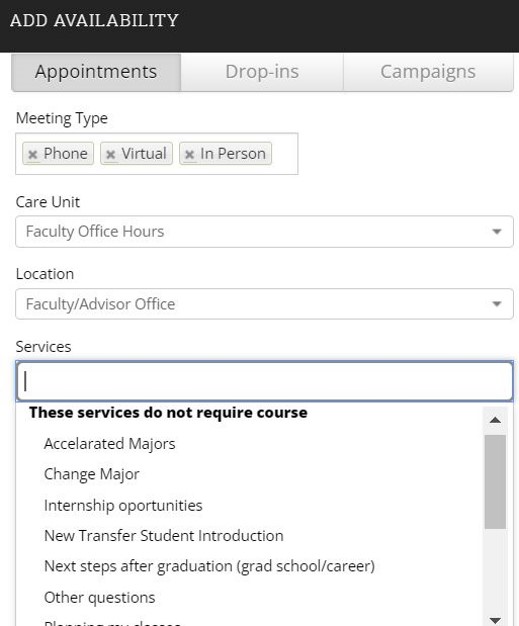
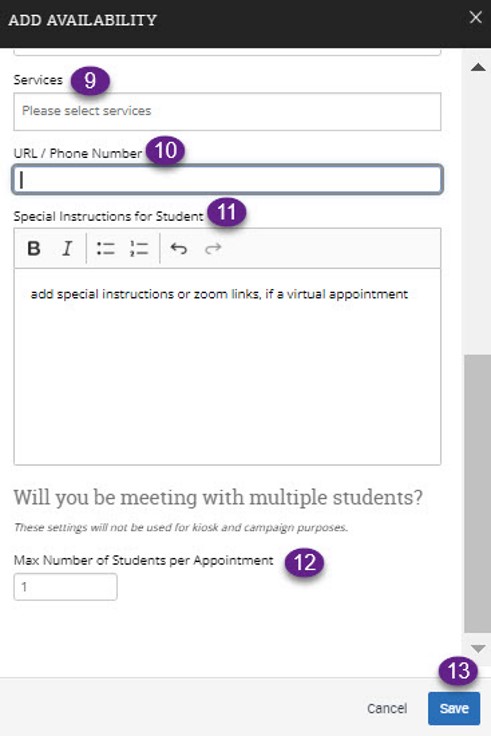
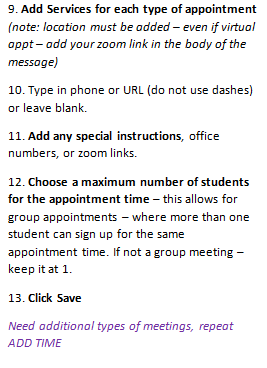
Add Availability
Services
There are two service options for Faculty Office Hours: Services that are course-specific, and those which are general advising services. Coordinating the type of services available helps guide the student when they are scheduling an appointment with you.
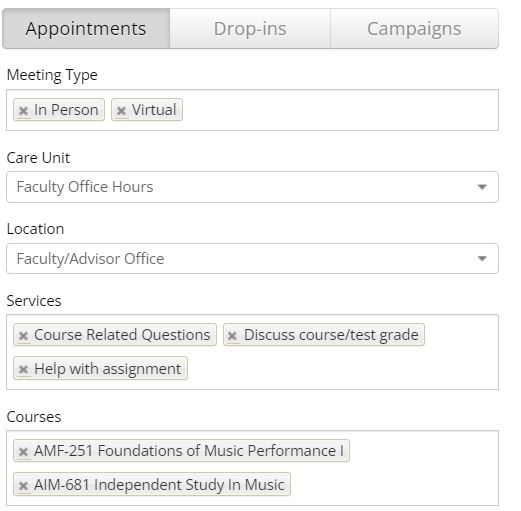
My Availability
A combination of general advising and course-specific appointments
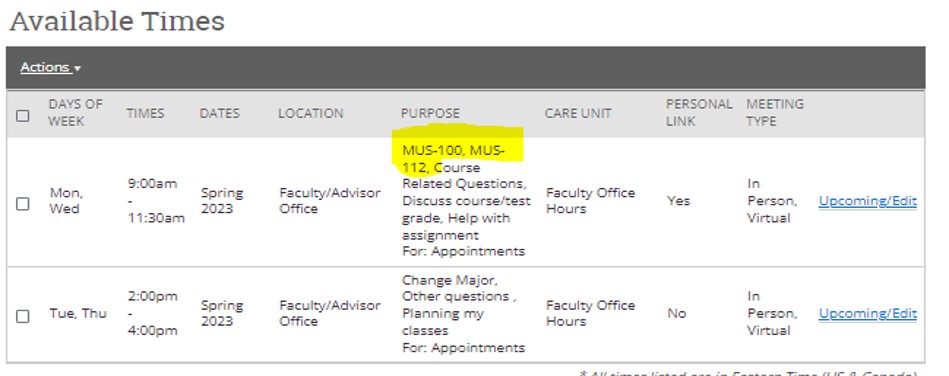
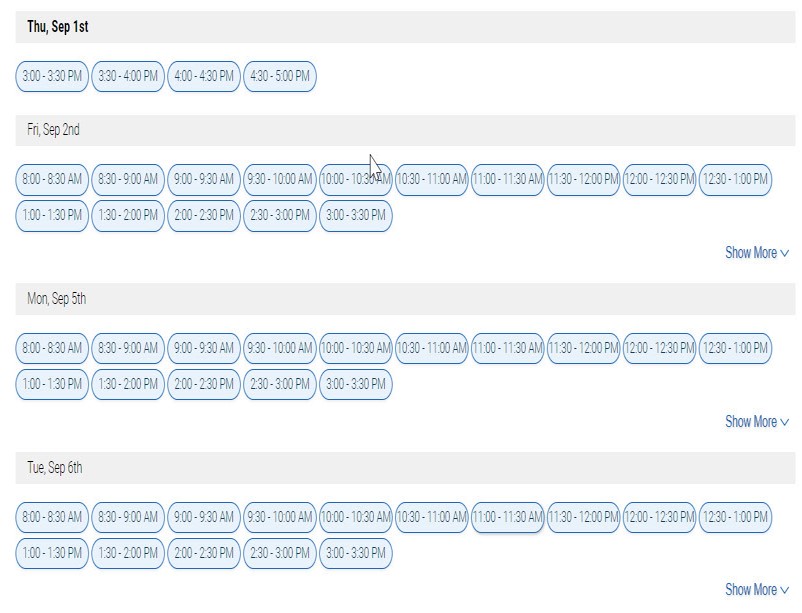
What a student sees…
The day and times of available appointments. The student chooses the appointment day and time and completes an appointment information form.
- Each Office visit defaults to a 30-minute time frame. Appointments will be set every 30 minutes.
Important Details
- There is a time block within Navigate. A student cannot schedule a meeting with you in less than 12 hours. Otherwise, Students will only see available appointments 12 hours after they click on make an appointment or use your Personal Appointment Link (PAL).
- Appointment length is 30 minutes.
- If additional timeframes are needed for specific types of meetings for a specific group of students an Appointment Campaign may be a solution. See details in the Navigate Training Site.
Last Step –Syncing your Outlook Calendar with Navigate
Navigate ONLY syncs with the WCU Outlook Calendar.
Calendar syncing is required when you set up office hours in Navigate to prevent double bookings.
It all starts with your calendar in Navigate.
On your Homepage, click on the calendar icon to open the My Calendar page.
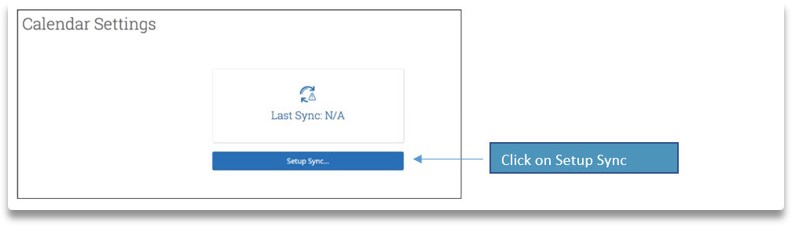
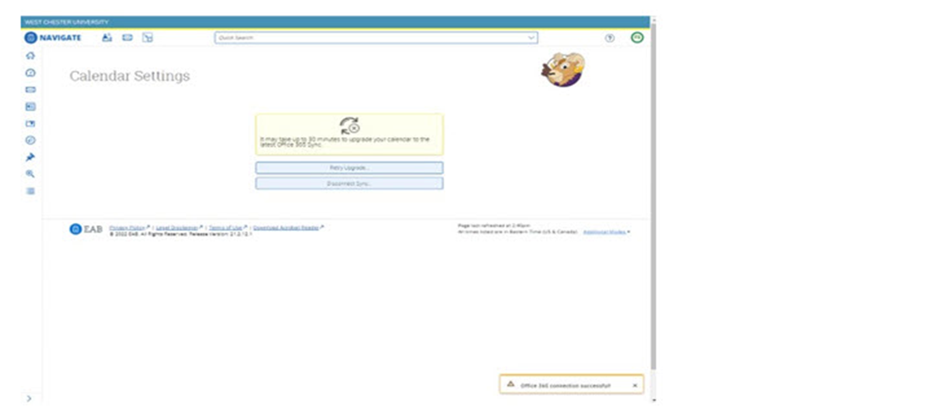
Click on Settings and Sync on the right side to start the syncing process.
The next few steps will complete the syncing process. This takes 5 to 15 minutes.
Click on Setup Sync

The next few steps will complete the syncing process. This takes 5 to 15 minutes.
Click on Setup Sync
Click on Microsoft Office 365
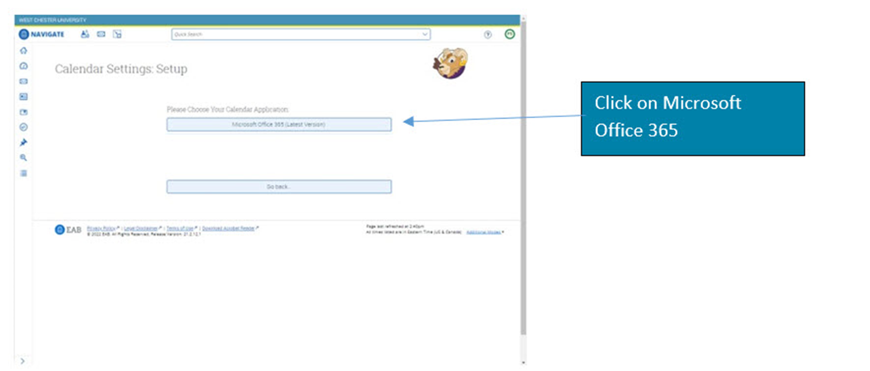
Complete WCU account information
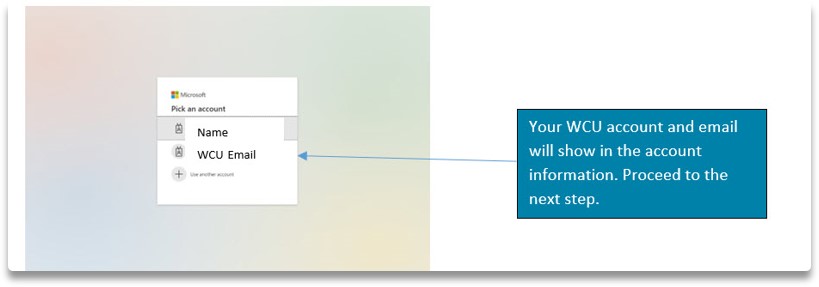
Proceed to sync.
Click on the Calendar icon after 5 minutes to view calendar.

View of Synced Calendar with personal appointments and Navigate generated appointments on the same calendar.
The "Busy" annotations on the Navigate calendar are reference appointments brought over by your WCU calendar. Students will view these times as “busy” when they view your availability.
If a student made an appointment with you in Navigate, you will see the details. EX: January 12th at 10 am – Planning Classes.
Your WCU calendar is the primary calendar - If you book any new appointments. on your WCU Outlook calendar, that timeslot is unavailable for a student to schedule an appointment, this prevents 2x bookings.
For additional detailed how-to instructions, view the Syncing your Outlook Calendar with Navigate video in the Navigate Training Site.
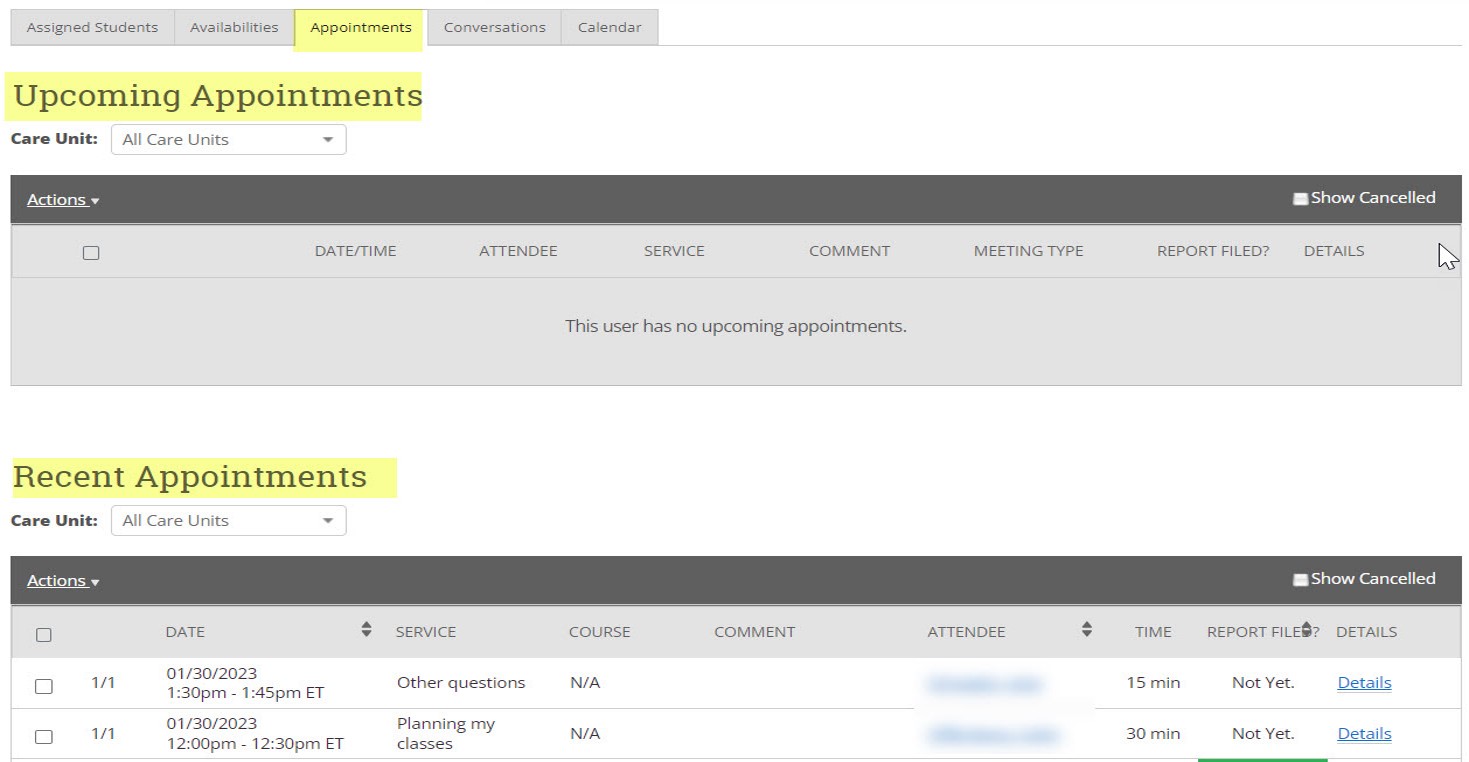
View Appointments on the Home Screen
Click on the Appointments tab on your staff homepage to see your upcoming and recent appointment details.
Tips and Tricks for Office Hours
Your WCU Outlook is your dominant calendar. Any additional entry added to your WCU Outlook calendar will overrule any appointment in Navigate.
Add your Navigate Office hours times and days to your Outlook calendar. Adjust the “Busy” default in SHOW AS in the Options section of Outlook to “Free”.
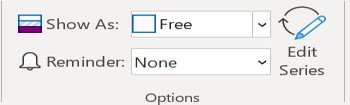
If you leave the “Show As” with the default of BUSY - this will block out all Navigate appointment availability and students will not be able to make an appointment.
Any appointments placed on your Navigate calendar will also be duplicated on your WCU calendar since you synced your calendars. No need to view 2 different calendars. All Navigate Appointments will appear on your WCU Outlook calendar.
- Students will not see any student or staff personal calendar information when they look at appointment availability.
Canceling a Student Appointment
If students are scheduled for an appointment and you need to cancel the appointment, due to sickness, conflicting appointments, or personal reasons, you will need to contact students individually to cancel their appointments. This is a manual process.