
Inbox
Overview
OU Campus has an internal messaging system that allows users to send messages to other users and groups of users. These messages can be attached to requests for approval as part of the Workflow process, or they can be sent to users without associating them with a page. All messages can have a copy sent to a user's email address in addition to being sent internally in OU Campus.
All workflow-related messages reside in the Workflow section of the Mailbox. All other messages reside in the Inbox section, with the ability to compose, reply, forward, and delete messages, as well as view sent messages in the Sent section.
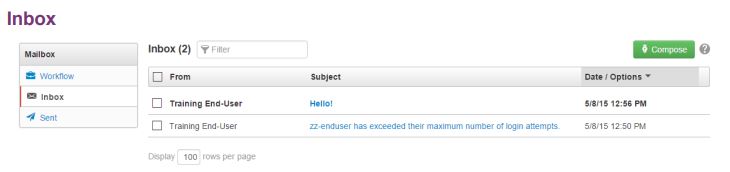
The Inbox is similar to a standard email inbox. Users can navigate to the Inbox from the Dashboard menu in the Global Navigation bar or by clicking the link to the Inbox on the Dashboard itself.
Inbox messages can also be previewed from the Dashboard through the Inbox Gadget. Clicking a message in the gadget will take users to the message in the normal Inbox interface.
Example of Inbox Gadget in Dashboard

Composing Messages
Compose is found in the Inbox and in the Sent box. By default, the Send a Copy by Email checkbox is selected. This will send an email with the composed message to the recipient's external email account, as long as the user receiving the message has an email address on file. If no email address is on file, it will only send the message within OU Campus.
To compose a message:
- Navigate to the Inbox or Sent box.
- Click on the Compose button, found in the top right of either screen.
- A modal will appear. Enter the user to whom the message should be sent in the To field. A user or a group of users may be selected from the drop-down, which appears when the user clicks into the field.
- Enter a Subject And Message
- By default, the Send a copy by email checkbox is selected. To only send the message within OU Campus, uncheck this checkbox.
- When the message is complete, click Send.
Viewing, Replying to, and Deleting Messages
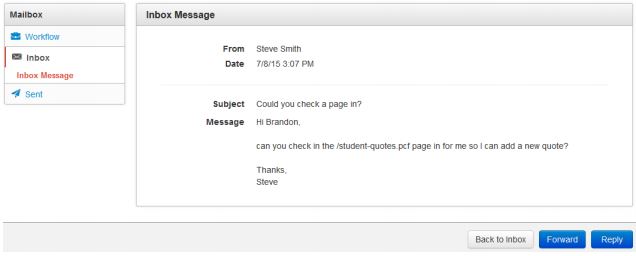
To view a message on the Inbox screen, hover over the message row and click View, or click the hyperlinked message subject. From the gadget, click anywhere on the desired message to enter the message view in the Inbox screen.
Use the blue Reply button to reply to the message, or use the drop-down indicator next to the Reply button to forward the message to another user. A user can return to the Inbox without responding to or deleting the message by clicking the Back to Inbox button or the Inbox button in the local navigation bar on the left.
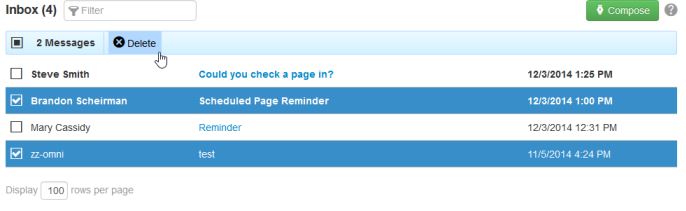
A message may be deleted by hovering over the message row in the Inbox list view and clicking Delete. Multiple messages may be deleted by selecting the checkbox next to each message and clicking the Delete icon that appears in the top row.
Sent
The Sent list view shows messages that the user has sent and messages that were sent in association with scheduled publishes, reminders, and the workflow process. If a message that has been sent to the user is replied to or forwarded, then that is also shown on the Sent screen.

Other functionality available from the Sent screen includes:
- A list of the number of sent messages
- A filter tool to narrow results by the recipient or the subject
- A Compose button to immediately compose a new message
- Columns that are sortable by recipient, subject, or date
- Multi-select checkboxes to delete multiple messages at one time
- The ability to review, reply, forward, and delete messages from the Sent view
- Items that can be hovered over in the list view, allowing users to view or delete individual messages
Forwarding a Message
Users can forward previously sent messages to other users and groups.
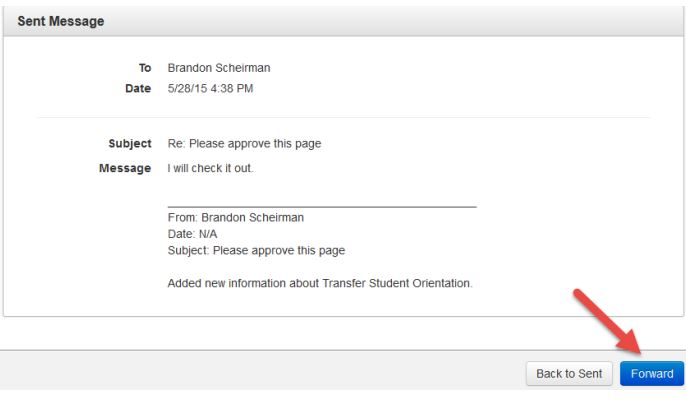
To forward a message:
- From the Sent screen, click the Subject column of the desired message. Alternatively, hover over the message and click View.
- Click Forward in the top right and fill in the To field with the desired recipients. Modify the Subject and Message fields as necessary.
- By default, a copy will be sent via external email. If the user does not have an external email associated with their account, then the message is only sent within the CMS.
- Click Send.