
Publishing Content
Publish Now
- Navigate to the Pages list view by selecting Content > Pages from the global navigation bar. Additionally, expanding the File Navigation sidebar will also display a list view of all pages.
- Hover over the target content’s row and select Publish from the Publish menu. Additionally,
clicking Edit in the Edit menu will open a view containing the Page Actions toolbar.
From here the user can also click Publish.

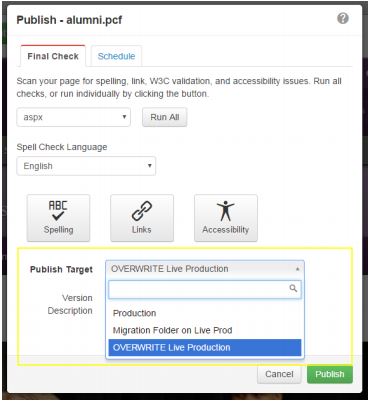
- If the Final Check or Page Check modal appears, optionally run any of the available tests and click Publish Now.
PLEASE REMEMBER: On Publish Target you must choose OVERWRITE Live Production to publish to the live server!
Schedule a Publish
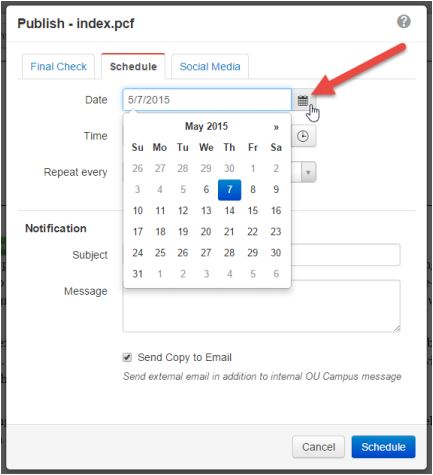
1. Navigate to the Pages list view by selecting Content > Pages from the global navigation bar. Hover over the page content’s row and select Schedule from the Publish menu.
2. Additionally, this action is available from the Page Actions toolbar. From here the user can also 21 click Schedule, which is an option in the drop-down menu attached to the Publish button. The Schedule modal will open.
3. From the Schedule modal, select a Date and Time that the content will be published on. Optionally, users can repeat publish by inputting a number in the available text field, and selecting a measurement of time from the corresponding drop down menu.
Submit for Approval
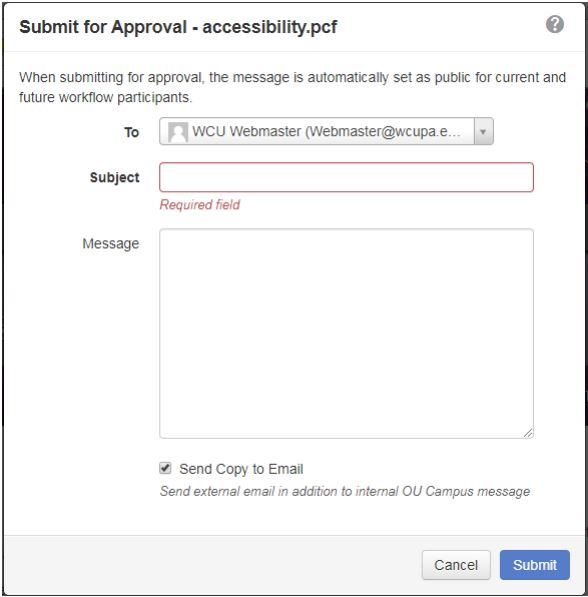
1. Users in a workflow will only have the option to submit pages for Approval before they are published. To submit a page, navigate to the Pages list view by selecting Content > Pages from the global navigation bar. Hover over the page content’s row and select Submit from the Publish menu.
2. Additionally, this option can be selected from the Page Actions toolbar. From here the user can also click Submit.
![]()
3. The Submit modal will open with an approver selected in the To drop down menu. Enter a text in the Subject and Message fields then hit submit. This will send the current page to the designated approver. Note: The page will be locked to the approver until changes are either declined or published.
Approve and Publish or Decline Content from Other Users
1. Navigate to the Workflow view by selecting Dashboard > Workflow.
2. Hover over the page awaiting approval and select View.
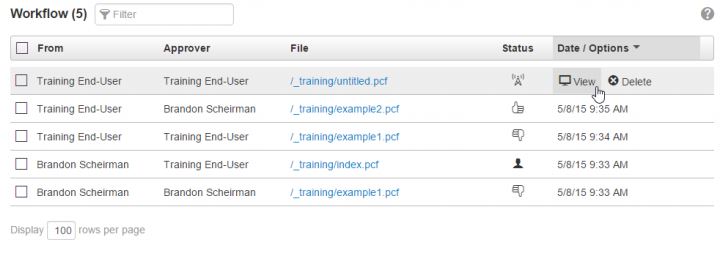
3. Review the content, and if the content meets the requirements to be published, click Publish. If the content does not meet the requirements to be published, click Decline.
![]()
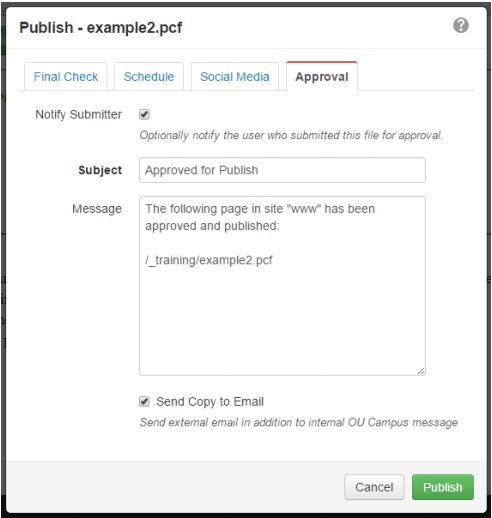
4. Fill out all necessary fields in the Decline or Publish modal. Click Publish or Decline to complete the action.
Reassigning Approval of Content from Users
1. Navigate to the Workflow view by selecting Dashboard > Workflow. Hover over the page awaiting approval and select View.
2. Click the drop- down arrow on the Publish button and select Reassign.
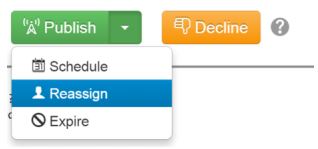
3. Select a user to send the file to from the drop-down menu labeled To.
4. Fill out all necessary fields and click Submit.
Schedule an Expiration
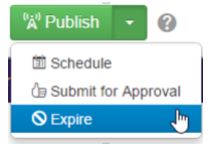
1. Navigate to the Pages list view by selecting Content > Pages from the global navigation bar. Additionally, expanding the File Navigation sidebar will also display a list view of all pages. Hover over the pages content’s row and select Expire from the Publish menu.
2. Additionally, this option is available from the Page Actions toolbar. From here the user can also click Expire, which is an option in the drop-down menu attached to the Publish button. The Schedule Expiration modal will open.
3. From the Schedule Expiration modal, choose an Expire Type (either replace content on the page with content from another page or recycle the page).
4. Select a Date and Time for the file to expire.
Click Schedule when finished.
Why would you need to schedule an expiration? If you have a timely event or information such as a registration page etc…
Page Check
Page Check is used to run a series of checks on a page before it is published. Page Check can be run from the Page Actions toolbar, or it can be configured to be run when you click the Publish button (this is called Final Check). There are four checks available: Spell Check, Link Check, Accessibility Check, and W3C Validation. To run Page Check:
1. Navigate to the Pages list view by selecting Content > Pages from the global navigation bar. Hover over the pages row and select Page Check from the Review menu. 25 2. Additionally, selecting Page Check from the Page Actions toolbar will take users to the Page Check modal.

3. Click on one of the tests (Spelling, Links, W3C Valid, and Accessibility) to run them individually, or select Run All to run all available tests.
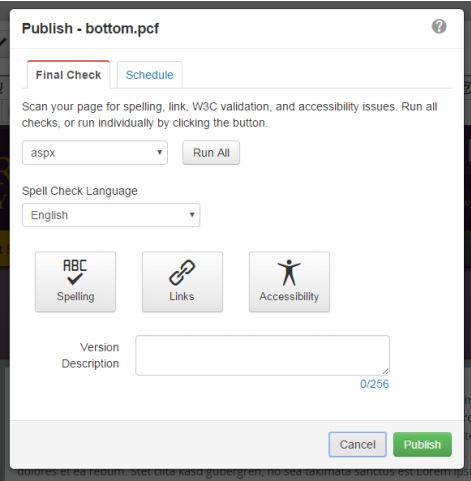
4. Review results and click Done when finished. You may get some errors when doing the page check but make sure that spelling is checked!