OneDrive
Intro to One Drive
One Drive is a cloud based file storage system with online editing and collaboration tools for Microsoft Office documents and is part of Microsoft 365.
One Drive can be utilized in many different ways. It can be used as a simple store for documents, as a way to access files from any location on any device, or as a collaboration tool to share and jointly work on documents. Access to files can be via a web browser, directly from Office 2016 desktop programs, in Windows File Explorer, in the Office Apps for IPads, iPhones and Android tablets or synchronized with a local folder on your computer.


Signing On:
To access OneDrive, sign in by opening a web browser and going to www.office.com and following the prompts to sign onto to One Drive Business. Enter your WCU credentials when asked to sign on.

Accessing OneDrive
OneDrive can be accessed in multiple ways from a variety of devices. Recommended methods differ depending on the ownership, type and operating system of the device.
- Web Portal (using your browser)
- OneDrive Client (local to your desktop or laptop)
- Mobile App (Smart phone or tablet
Installing the OneDrive Client
- Login to the Microsoft 365 Portal at www.office.com using your WCU email address and password.
- Once logged in, click on the OneDrive title.
- A new tab should open with a web view of your files and folders in OneDrive.
- You can now view, edit, share, and download your files and folders through the web interface.
- If your computer is running Apple OS or Windows 7, contact the Help Desk
- If your computer is running Windows 10 follow the steps below
- Steps 1, 2, 3 via November note
- From the App Store, or Google Play search for “Microsoft OneDrive” and select install.
- Once installed, open OneDrive, press “Sign in”
- Following the onscreen instructions, use your WCU login credentials when prompted
- Login to the Microsoft 365 portal at www.office.com, using your WCU login credentials.
- Click the Icon for OneDrive.
- Click Sync
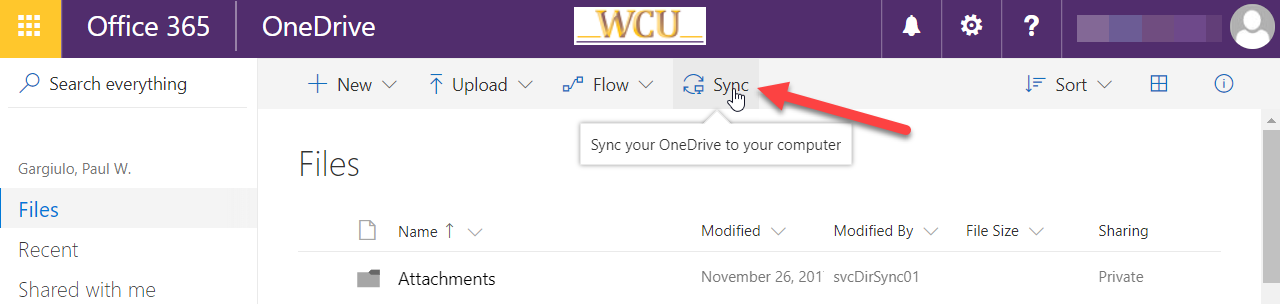
- The browser will open the OneDrive client on your computer.
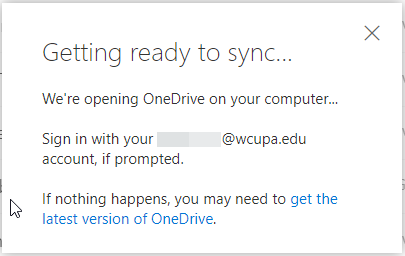
Note: If there is no OneDrive client on your machine, or if it needs to be upgraded, you will see the following window. Click the link and follow the prompts to install the latest version of OneDrive:
Syncing OneDrive
- Any files saved within the OneDrive client will automatically to the server. To pulls files down from the server to a new or specific device, follow these steps.
- Using Chrome or Firefox, login to the Microsoft 365 portal at www.office.com, using your WCU login credentials.
- Click the icon for OneDrive
- Click Sync

- The browser will open the OneDrive client on your computer.
Basic File Management
Create, Upload, Sync and Preview documents
The main Files window in OneDrive displays the contents of your OneDrive library arranged
as a standard file display in either a tile or list view. The Navigation Pane to the
left contains links to other parts of our One Drive site such as the Recycle Bin for
deleted file and Shared with me, for accessing documents others have shared with you.
The Quick Command Bar will allow you to carry out a range of basic file management tasks. The options listed on the command bar are context driven and will change depending on what you have selected. The default listings are New, Upload and Sync as described below:
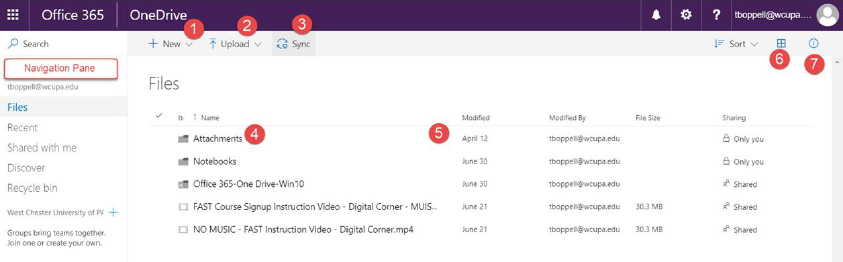
- Click +New to create a new document or folder. You can then add and edit content with
the online Office apps. In addition to all the main Office file types, you can also create an online survey with results exported to an Excel File stored in OneDrive. - Click Upload and navigate to the files or folders on your computer to upload them to OneDrive. Alternatively, in some browsers you can just drag and drop files and folders onto the OneDrive window (currently in the Chrome browser only). NOTE: For large numbers of files, it is better to use the sync client for uploading into OneDrive
- Click Sync to sync OneDrive with a folder on your local computer. Use of the sync
button
activates sync client software to download and keep all files from One Drive up to date. - To Preview a document, click on its name to open a view-only version in a separate tab.
- You can use standard drag and drop techniques to move an manage files and folders.
IN
list view, additional file actions (download, rename, copy, etc) are available by clicking
the ellipses(…) beside each filename. - You can change the view for any folder from list to preview tiles
- An information pane can toggle on and off, providing information such as file preview, recent file activity and sharing status.
Uploading Files to OneDrive
First, access OneDrive, by opening a web browser and going to office.com and following the prompts. Enter your WCU credentials when asked to sign on.
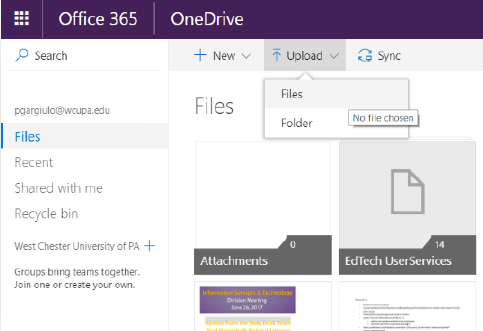
First, select “Files” from the side menu
Next, from the ribbon select “Upload” then “Files”
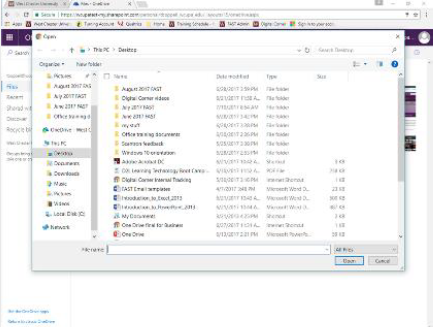
Choose the file you wish to add to One Drive by clicking the one you want and then Open:
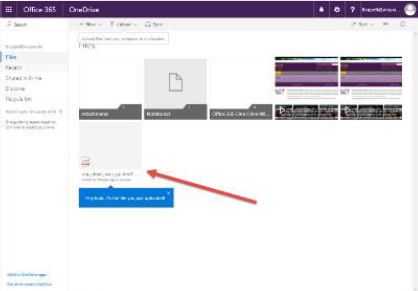
The file will then appear on the home File page of One Drive:
Sharing Files in OneDrive
Sharing documents allows you collaborate with others and give permissions to both view and edit together. In One Drive, with sharing, multiple users can edit a document simultaneously.
Steps for Sharing Files:
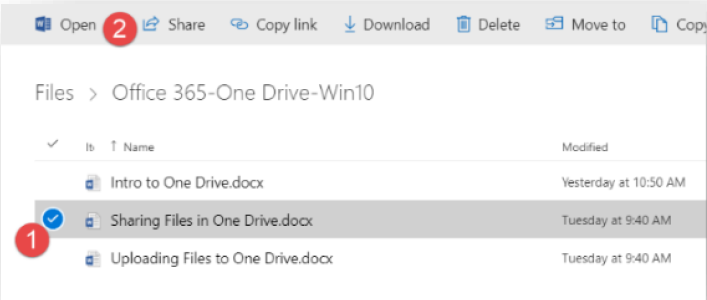
- Select the file by checking the selection box on the left (if in list) or clicking the tile folder/file.
- Click Share on the Command bar (or if using list view, click the ellipses (…) next to the file name).
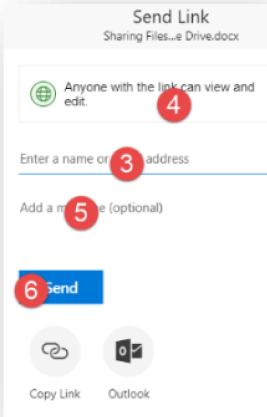
- The Send Link window will appear. Enter the email addresses of the people with whom you want to share the document or folder.
- Then, confirm if you want to grant Can Edit permission with the check box.
- If you choose Allow Editing, recipients can use Office Online to edit Office documents without signing in to make other changes (like adding or deleting files in a folder) recipients need to sign in with a Microsoft account
- If you pick Allow Editing and a recipient forwards the message, anyone who receives it will also be able to edit the item you’re sharing. People with edit permissions can also invite others to have edit permissions to the item.
- Those with Allow Editing permission have full rights to delete a file.
- Do not allow editing (uncheck box), that means people you invite can view, download or copy the files you share.
- Permissions for any person can also be changed later.
- If you want, type a message to be included with an email that’s sent to all invitees.
- When you are finished adding invitees and assigning permissions, click Send.
Sharing a Folder:
Sharing a folder provides a quick way to share many documents with other people at once and makes it easier to manage a set of shared documents. When you share a folder, you automatically share all files in that folder. Any document moved into a shared folder will inherit the folder share permissions. Folders are shared with the same procedure as for sharing a document. Individual files may be given different sharing permissions, if for instance you wanted to restrict access to different files.
Change or remove share permissions:
To change share permissions, select the file/folder then click share and go to the Shared with tab. The Shared with tab will display a list of everyone with whom it has been shared and their permissions. Click the drop down beside each user and select the desired permission (Edit, view, stop sharing). To stop sharing the document with everyone on the list, select the stop sharing option at the bottom of the window.
View Documents shared with you:
To view and access documents which other users have shared with you, go to the Navigation Pane in your library window and choose ‘Shared with me’. This will display a window listing all documents that have been shared with you from which you can then open and edit them. You can sort this list by the various columns. However as this is a virtual folder (that is, it is in reality just a list of links to other people’s files), you will not be able to use standard file management to organize it (create new folders, move files etc.)
Microsoft 365 Family Share: Removing Access to OneDrive Files
West Chester University Provides the campus community with 5 licenses of Microsoft 365 which clients can share if they choose to do so. When a client installs O365 of a personal device using their WCU credentials, access to their WCU OneDrive data is granted by default. If a client chooses to install a copy of O365 on a family members personal device, they must manually remove access to their WCU OneDrive data. Instructions to remove access to WCU account data after O365 installations on personal devices is listed below:
Example of Access to WCU OneDrive Data through O365:
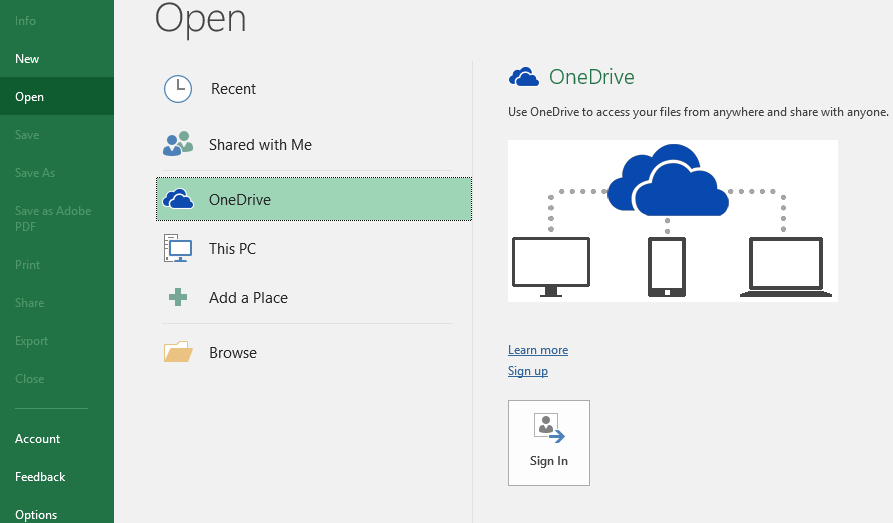
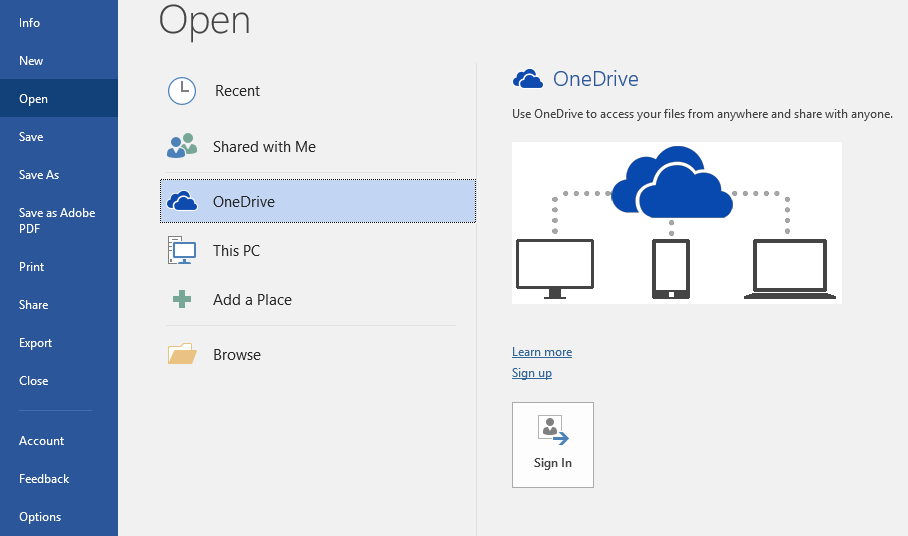
1. Open Word
2. Click File
3. Click Open
Removing Access to WCU OneDrive Data through O365:
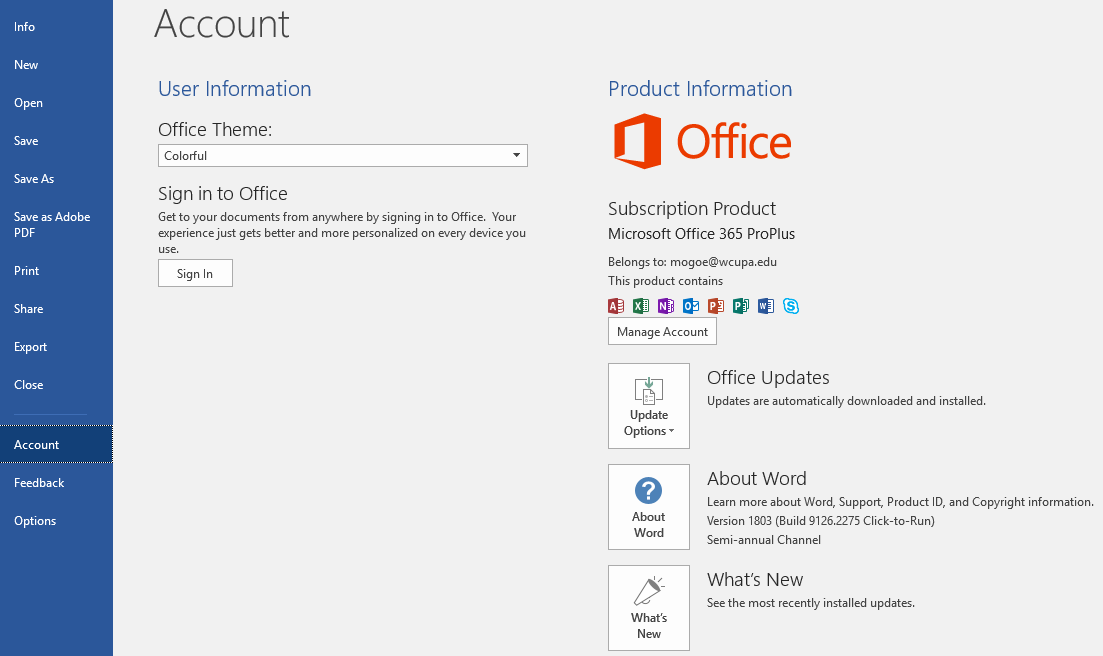
1. Open Microsoft Word
2. Click File
3. Click Account
4. Click Sign out
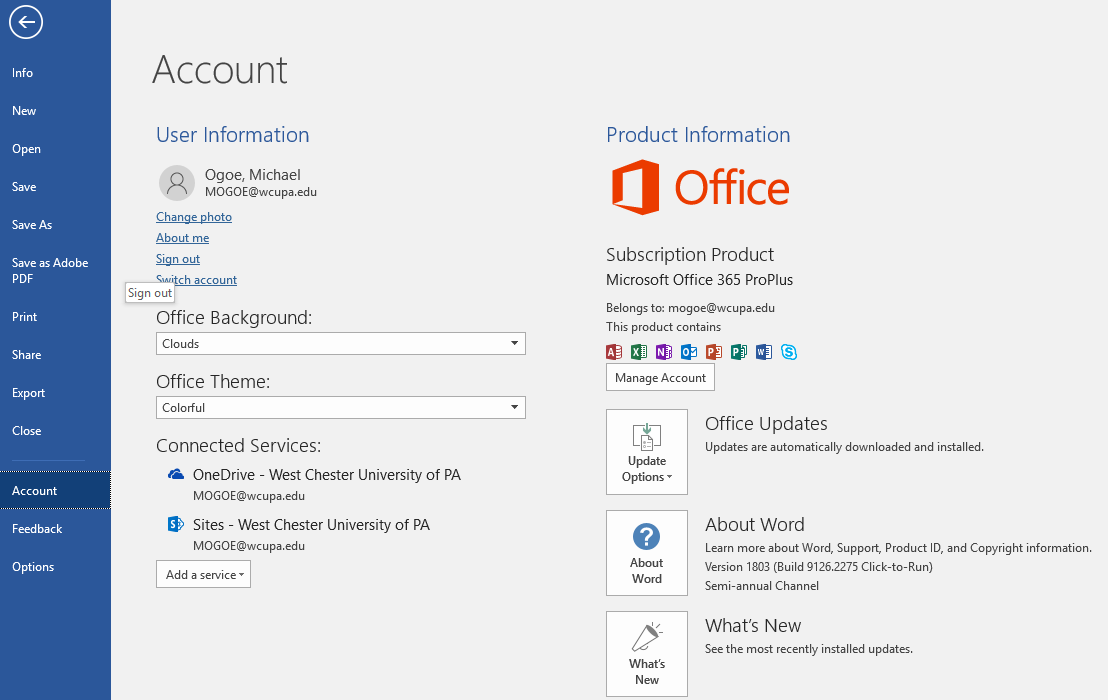
After Signing out, the user’s WCU O365 subscription will remain active as seen below:
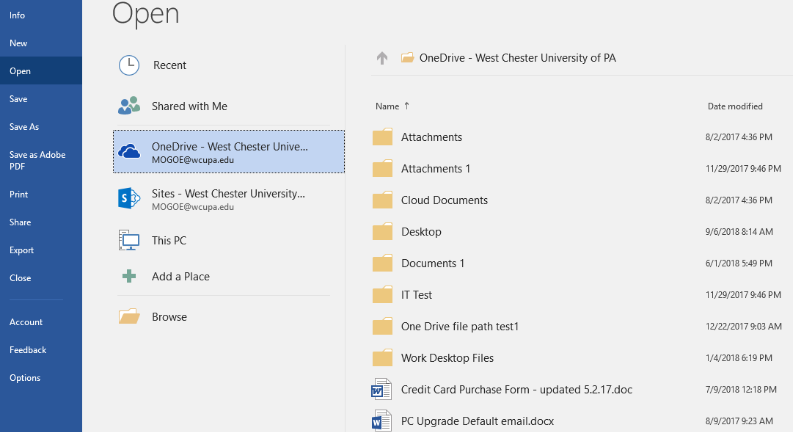
After Signing out, the user’s WCU OneDrive data can no longer be accessed within the “Open” tab:
The WCU O365 Family share can now be safely used as this setting applies to all other O365 applications installed such as PowerPoint, Outlook, OneNote, Publisher, Access, and Excel.
Example of the settings being applied to O365 Excel: