

Class Schedule: View Your Classes and Schedule
Purpose: This guide shows how to view your class schedule, meeting details, instructor information, and weekly calendar using the Classes and Register for Classes cards in RamPortal.
Navigation
- Log in to RamPortal using your WCU Single Sign On (SSO).
- Locate the Register for Classes (Fig. 1) card on your home page and select the REGISTER button.
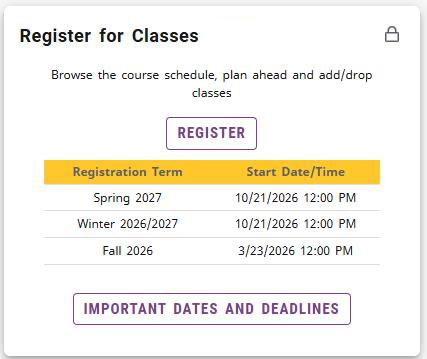
Fig. 1
View List of Your Registered Classes
The View Registration Information page provides several ways to view your registered classes and schedule.
- From the Register for Classes card, select View Registration Information (Fig. 2).
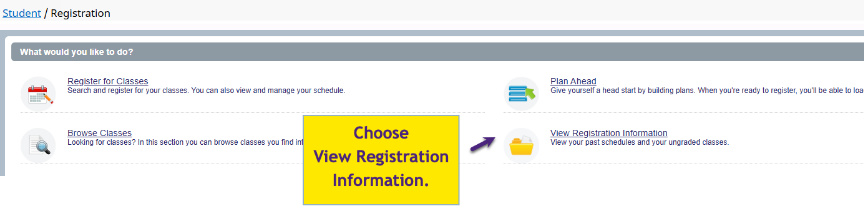
Fig. 2 - Choose the term using the Term drop-down (Fig. 3).
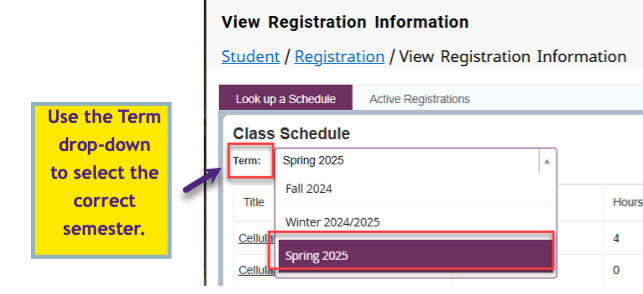
Fig. 3 - Your registered classes are displayed in the List View (Fig. 4) at the top of the page.
- To view additional information about a class, click on the class title in the List View or on Schedule Details tab (Fig 4). This opens the Class Details page, where you can view information such as the instructor, meeting times, attributes,
prerequisites and other course details.
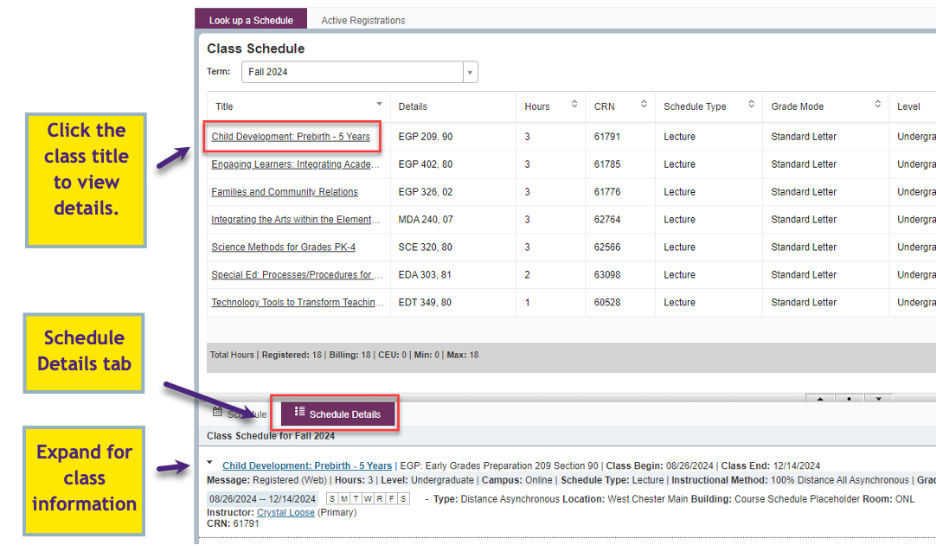
Fig. 4
Asynchronous Classes and Online Class Details
- To view asynchronous classes, open the Register for Classes card (Fig. 1) and select View Registration Information.
- Asynchronous classes are listed in the List View at the top of the page and on the Schedule Details tab (Fig 4).
Note: Asynchronous classes do not appear in the calendar view because they do not have scheduled meeting times. - To view more information about your asynchronous class, click on the class title in the List View or open the Schedule Details tab.
Note: Zoom or online meeting links for asynchronous or online classes are in D2L.
Waitlisted Classes
- To view waitlisted classes, open the Register for Classes (Fig. 1) card and select View Registration Information.
- Waitlisted classes are displayed on the Schedule Details tab (Fig. 4).
- To check your Waitlist Position:
- Click the caret next to the class title to expand the class information (Fig. 4).
- Find the Waitlist Position field (Fig. 5). The number shows how many students are ahead of you on the waitlist.

Fig. 5: Waitlist Position
- Click the caret next to the class title to expand the class information (Fig. 4).
Weekly Calendar View
You can also view your class schedule in a weekly calendar format using the Register for Classes card.
- Open the Register for Classes card (Fig. 1) and select View Registration Information.
- Scroll to the bottom of the page to view your weekly calendar (Fig. 6).
Note: If your calendar is not displayed, verify that the correct term is selected and continue scrolling below the class list.
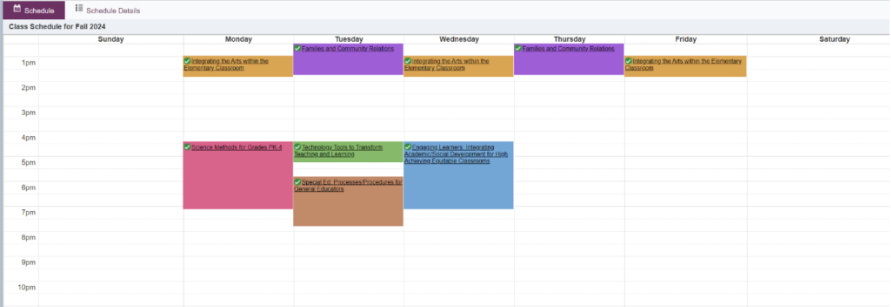
Fig. 6
Print and Save Your Schedule
- To print or save your schedule, open the Register for Classes card on your RamPortal home page and select View Registration Information.
- Click the printer icon in the top right of the page.
- Print your schedule or save it as a PDF.
View Your Class Schedule Using the Classes Card
The Classes card provides a quick view of your registered classes from the RamPortal home page.
- Locate the Classes card on your home page (Fig. 7).
- Use the scroll bar on the right side of the card to view all registered classes for the selected term.
- To switch terms, use the drop-down at the top of the card.
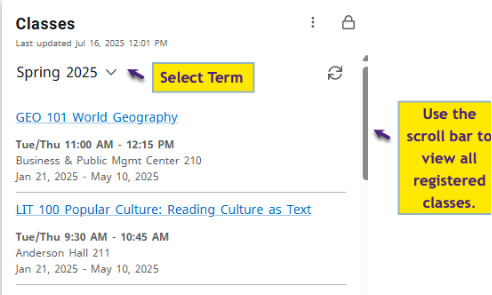
Fig. 7: Classes card on the home page. - To view additional class information like the instructor and credit hours, click on
any class listed on the card. This opens the Classes page.
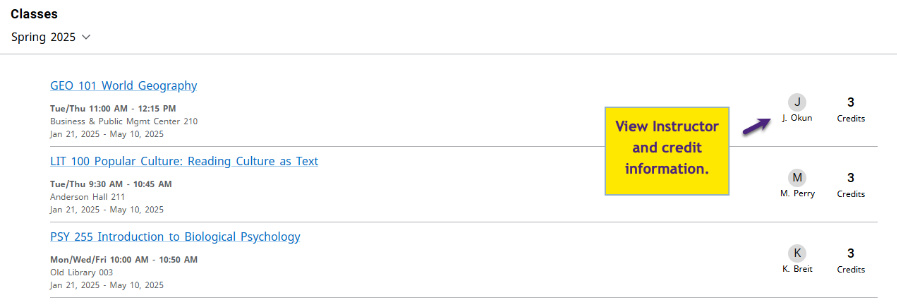
Fig. 8: Detailed view. - For even more details, click on any class title to show full class information with
Instructor contact as well.
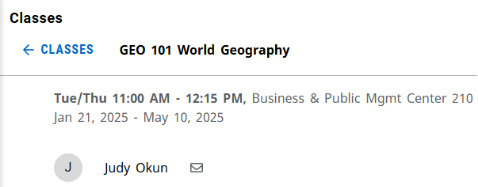
Fig. 9: Full class detail view.
For additional assistance, submit an AES Support Portal Ticket.