
Tenure and Promotion: Candidate User Guide
Purpose: West Chester University’s Tenure and Promotion Application Procedure.
Before continuing, please note the following:
The OnBase Web Client is supported on the following browsers:
- Google Chrome 129 or later
- Microsoft Edge on Chromium 129 or later
- Mozilla Firefox 131 or later
- Mozilla Firefox Extended Support Release (ESR) 128 or later
- Safari 17 or later, with the exceptions of full screen mode and Safari Reader
Please disallow popup blockers on your computer when using the OnBase system for this process. If you do not know how to disable popup blockers on your browser, please submit a ticket for support. You must have your employee ID and your WCU username/password to proceed.
| Contents |
|---|
| Access TeP Candidate View |
| Candidate Application Submission |
| Candidate Document Upload |
| Access Current Documents |
| Access Archived Documents |
| Delete Documents |
| Access Recommendation Letters |
Access TeP Candidate View
- Browse to onbase.wcupa.edu using an approved browser from the list above.
- Select Login. Use your WCU Credentials. Fig 1.
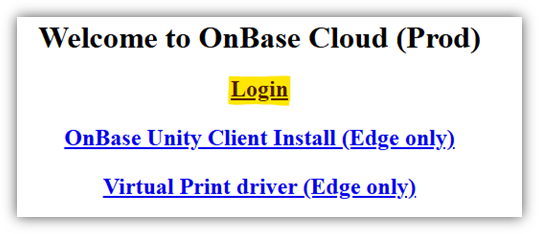
Fig 1 - The OnBase application will open. The system defaults to Document Retrieval, you will
need to access StatusView to proceed. Begin by selecting the menu button in the top
left of the screen. Fig 2.
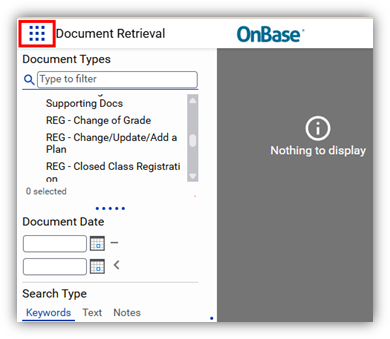
Fig 2 - The menu will open, select Open StatusView. Fig 3.
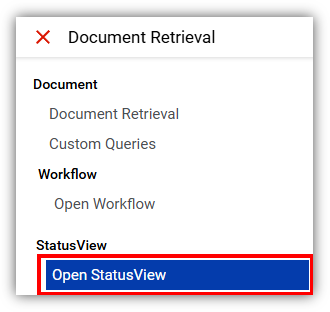
Fig 3 - Ensure that TeP Candidate View is selected. Fig 4.
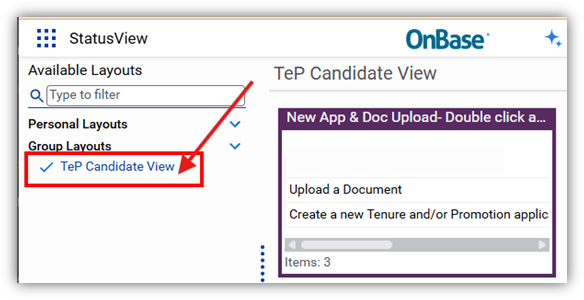
Fig 4
Candidate Application Submission
- Double click the Create a new Tenure and/or Promotion application link in the top left of the portal. Fig 5.
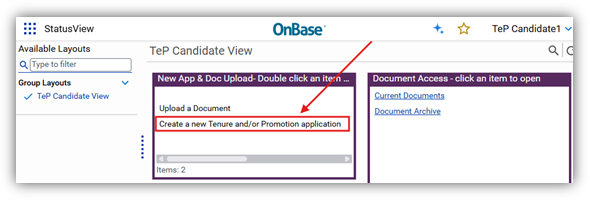
Fig 5 - A new window will open with a blank application. The header should populate your information.
Fig 6.
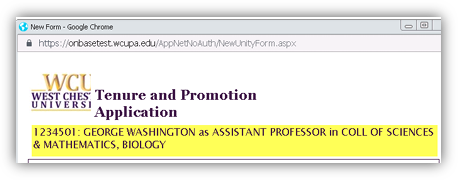
Fig 6
NOTE: You may only submit one application per review cycle. If you need to make an edit to your application, use the Current Documents link. - Fill in the fields as requested. Be sure to follow all instructions on the application.
Fig 7.
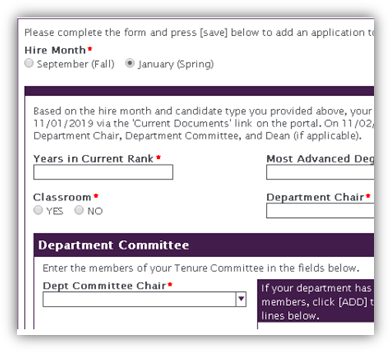
Fig 7 - Select whether you are going to be submitting any HARD COPY materials for consideration.
These items will not be uploaded electronically.
- If you do not have additional hard copy items, click "NO".
- If you do have additional hard copy materials, select "YES" and then select the Add button for each item and fill out the Description and Reference Number. The reference
number can be up to 5 characters. Fig 8.
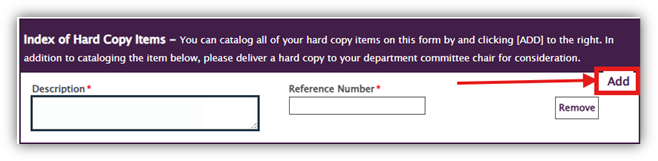
Fig 8
- Complete both portions of the Signature sections including the response to Statement,
signature of article 13, and signature of accuracy and Act 182. A total of two signatures
are needed. You can sign using your mouse. Fig 9.
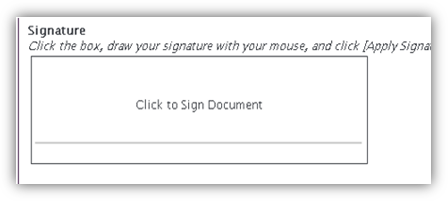
Fig 9 - When you are satisfied with your application, click SAVE. Your application will be accessible via the Current Documents link in the portal.
Fig 10.
Fig 10
Candidate Document Upload
- Double click the Upload a Document link in the top left of the portal. Fig 11.
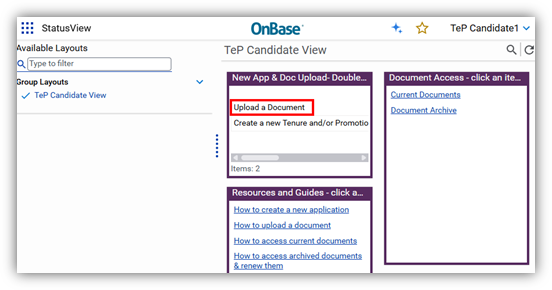
Fig 11 - A new window will open. Please follow all instructions on the new window. These will mark any file specifications.
- Indicate whether or not you would like to receive a receipt of your submitted document.
Fig 12.
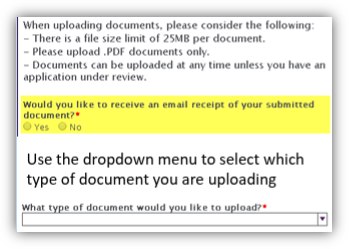
Fig 12 - Use the dropdown menu to select which type of document you are uploading. Fig 13.
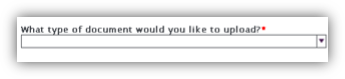
Fig 13 - You will see additional instructions and a browse button appear. These are specific
to the document type you are uploading. Fig 14.
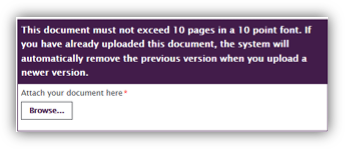
Fig 14 - You may be prompted to fill out additional fields. Fig 15.
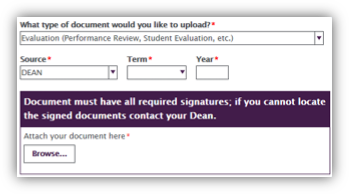
Fig 15 - Click on Browse… button and then navigate to the appropriate file that you wish to upload.
- When you are satisfied with your upload, click Submit. Your document is stored in your Tenure and Promotion File. Fig 16.

Fig 16 - Once you click Submit, you are prompted to fill out another form. Fig 17.
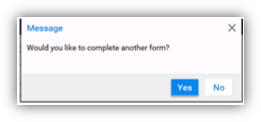
Fig 17- Click Yes to fill out another form
- Click No to close the window.
- Repeat for each document that you need to upload.
NOTE: You may edit your application until your deadline. On 12:01am the day after your deadline, you will not be able to edit your application and all of your documents will be sent to your Department Chair, Department Committee, and Dean automatically.
Access Current Documents
- Click the Current Documents link in the top right of the portal. Fig 18.
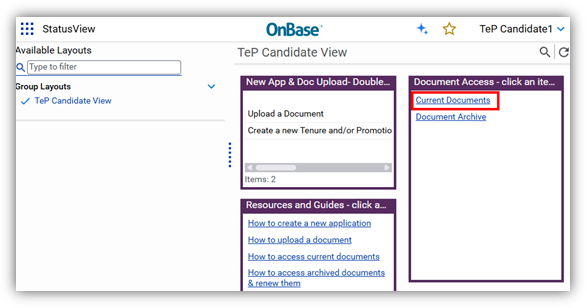
Fig 18 - A new tab will open with all your uploaded documents. You can navigate through your
materials using the headers in the top left. Fig 19.
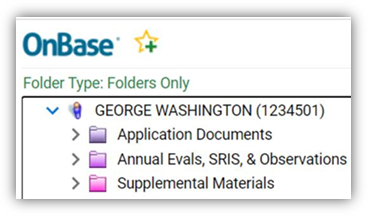
Fig 19 - Below the headers, you will have a document list with missing documents highlighted
in red. Fig 20.
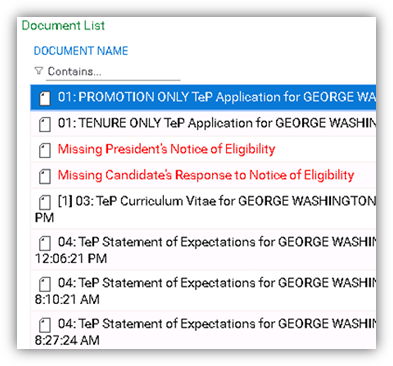
Fig 20 - You can click on any of the documents in the list to open it on the right side of your screen.
- If you are searching for a specific document type, you can use the search bar. Fig 21.
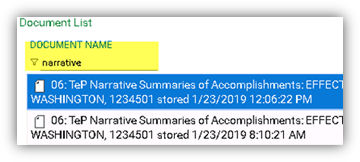
Fig 21
NOTE: You may delete and upload new documents until your deadline. The day after your deadline, you will not be able to delete or add documents, but you can view documents or download them from your file.
For additional assistance, submit a ticket for support.
Access Archived Documents
- Click the Document Archive link in the top right of the portal. Fig 22.
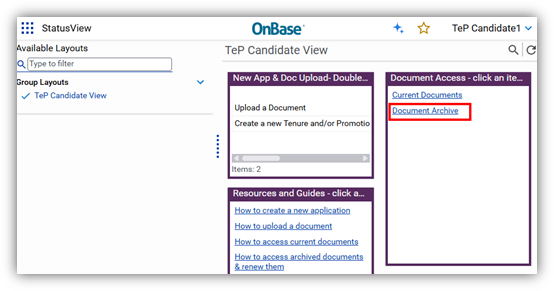
Fig 22 - A new tab will open with all of your uploaded documents. Click your folder to open
your file. Fig 23.
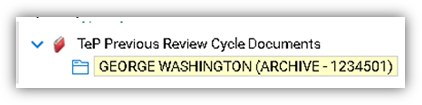
Fig 23 - Below the headers, you will have a document list. You can click any of the documents in the list to open it on the right side of your screen.
- If you are searching for a specific document type, you can use the search bar. Fig 24.
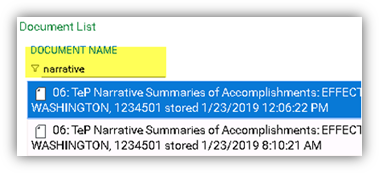
Fig 24 - You have an option to restore any document to your current file. Click the document
from the document list on the left that you want to restore. It will open on the right
half of your screen with a header at the top. Fig 25.
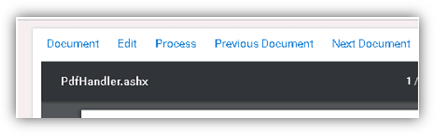
Fig 25 - From the top header, click Process. Hover your mouse over Workflow System Tasks and
choose TeP Restore Document. Fig 26.
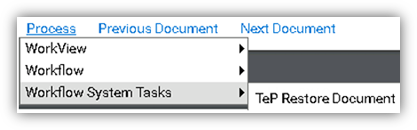
Fig 26 - The system will ask you to confirm that you wish to delete the document. If you select YES, the document will be deleted from your file. You will receive a confirmation message that your file was deleted.
- You may refresh your document list using the round arrow button. Fig 27.
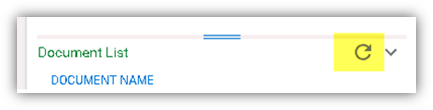
Fig 27
NOTE: You may restore documents until your deadline. The day after your deadline, you will not be able to restore, but you can view documents or download them from your file.
Delete Documents
- Click the Current Documents link in the top right of the portal. Fig 28.
Fig 28 - A new tab will open with all of your uploaded documents. You can navigate through
your materials using the headers in the top left. Fig 29.
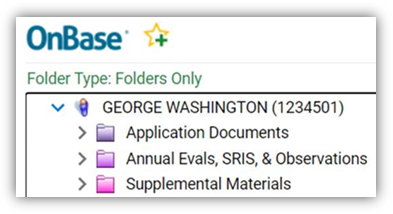
Fig 29 - Below the headers, you will have a document list with missing document highlighted
in red. Fig 30.
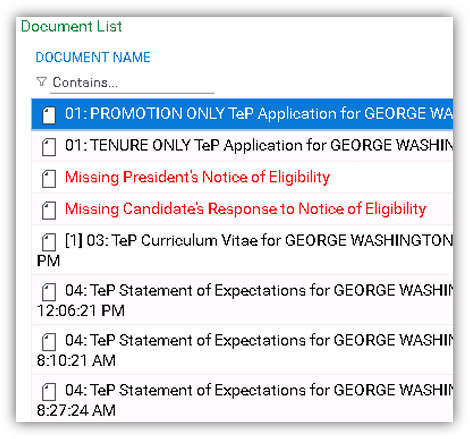
Fig 30 - You can click any of the documents in the list to open it on the right side of your screen.
- If you are searching for a specific document type, you can use the search bar. Fig 31.
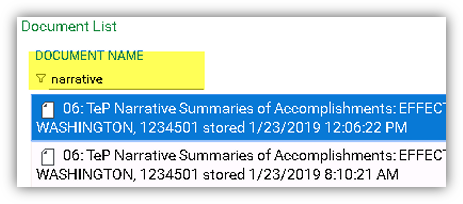
Fig 31 - You have an option to delete any document in your current file. Click the document
from the document list on the left that you want to delete. It will open on the right
half of your screen with a header at the top. Fig 32.
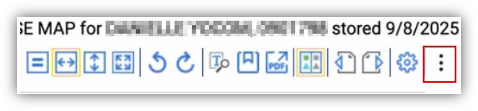
Fig 32 - From the top header, click the three vertical dots on the right, next to the gear.
Hover your mouse over Workflow System Tasks and choose TeP Delete Document. Fig 33.
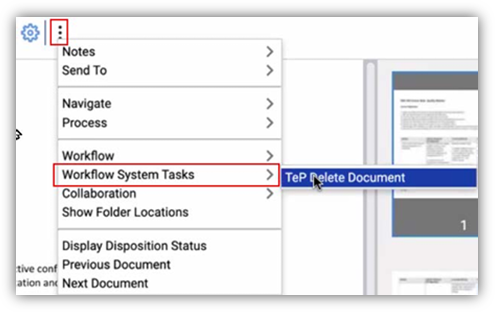
Fig 33 - The system will ask you to confirm that you wish to delete the document. Fig 34.
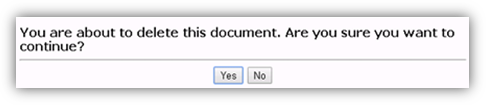
Fig 34 - If you select YES, the document will be deleted from your file. You will receive a confirmation message that your file was deleted.
- You may refresh your document list using the circular arrow button. Fig 35.
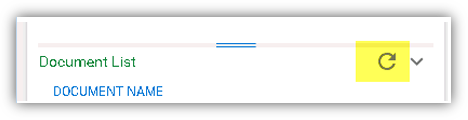
Fig 35
NOTE: You may delete documents until your deadline. The day after your deadline, you will not be able to delete, but you can view documents or download them from your file.
Access Recommendation Letters
- Click the Current Documents link in the top right of the portal. Fig 36.
Fig 36 - A new tab will open with all of your uploaded documents. You can navigate through
your materials using the headers in the top left. Fig 37.
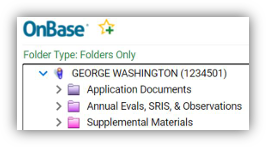
Fig 37 - After your deadline, your file will include a 4th header specifically for the recommendations
from Department Chairs, Department Committee Chairs, and Deans if applicable. Fig 38.
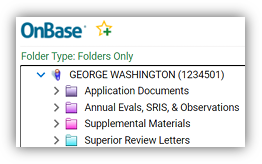
Fig 38 - You can click the fourth header to view your review forms and your recommendation letters.
- You will also receive a notification when a new recommendation letter is uploaded.
- If you are searching for a specific review, you can use the search bar. Fig 39.
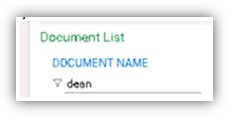
Fig 39
For additional assistance, submit a ticket for support.